My pressure cooker was a gift from my grandfather. He was cleaning out a few pans he didn't need. He offered a pressure cooker to me, but after examining what he was offering, I told him that he was missing pieces. While I didn't have one, I couldn't take the one he was offering.
A couple of days later, my mother called me. My grandfather had purchased one for me to use. I have enjoyed cooking with it. While I have only cooked pork chops and soups in it, I have been thrilled to use it. I actually hope to try a few other dishes with it soon.
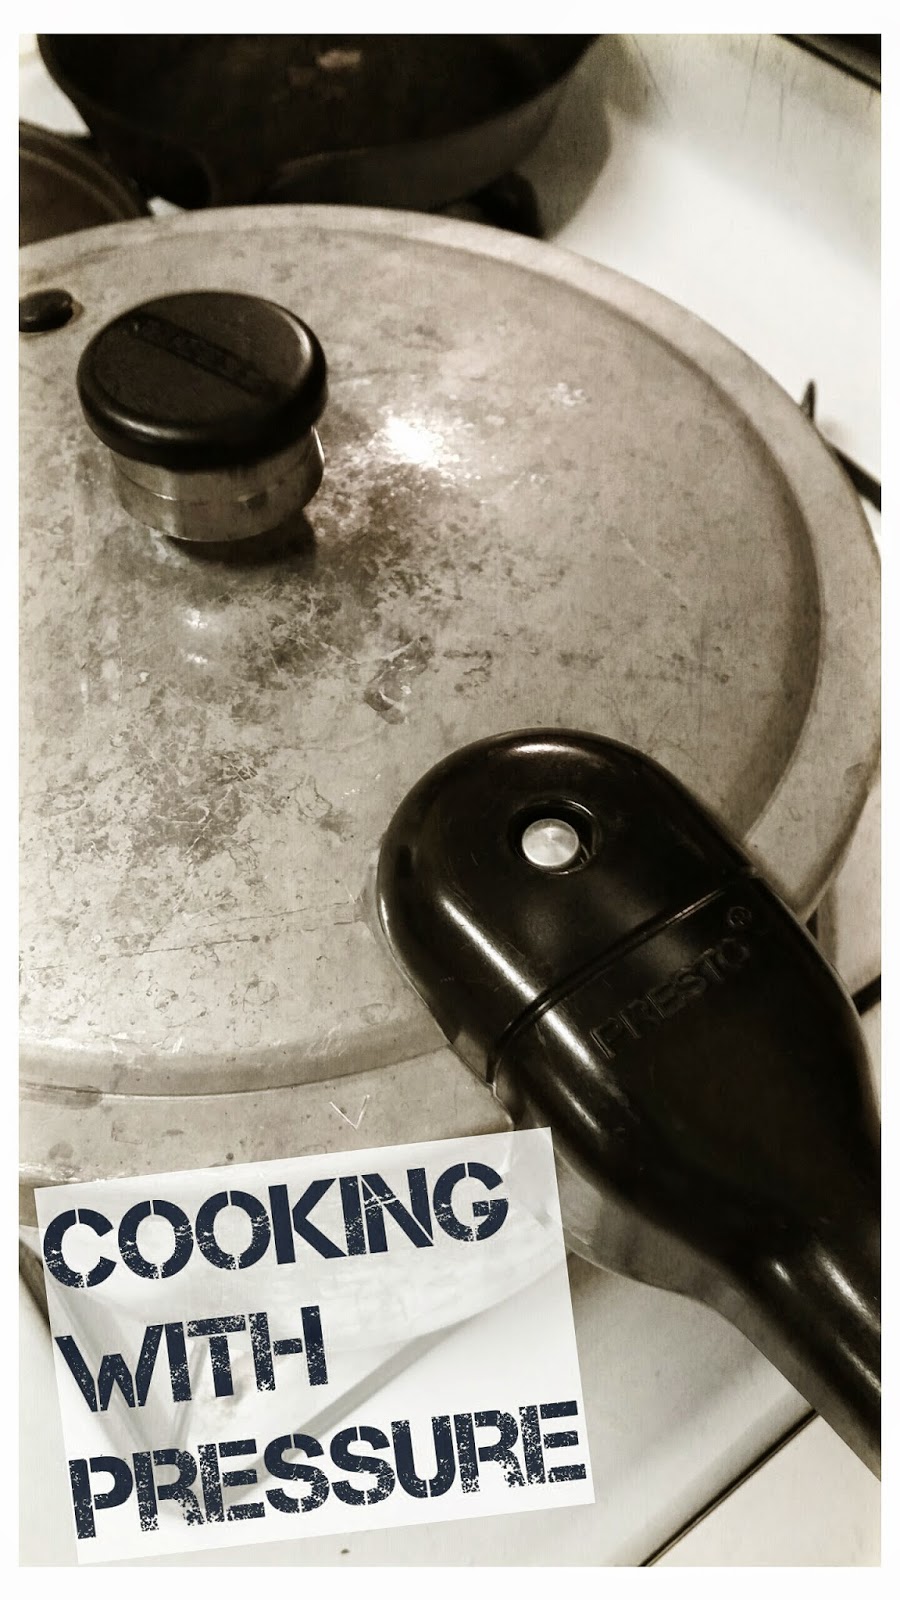
These are the pieces to my pressure cooker. There are many other kinds of models, but mine is not an electric pressure cooker. Mine uses heat applied to the bottom from the stove to cook dishes. Not many people cook with one of these bad boys. It can be intimidating. Heat and pressure with locks? Just a little! However, once you have practiced and have followed proper directions (see the manual for the pressure cooker you are using...they are all different!) you can enjoy cooking with them more often. Additionally, no one will have to know that your meal was not cooking all day long!
Make sure that you check all of your pieces.
1. Pressure cooker pot.
2. Pressure cooker lid
3. Rubber seal
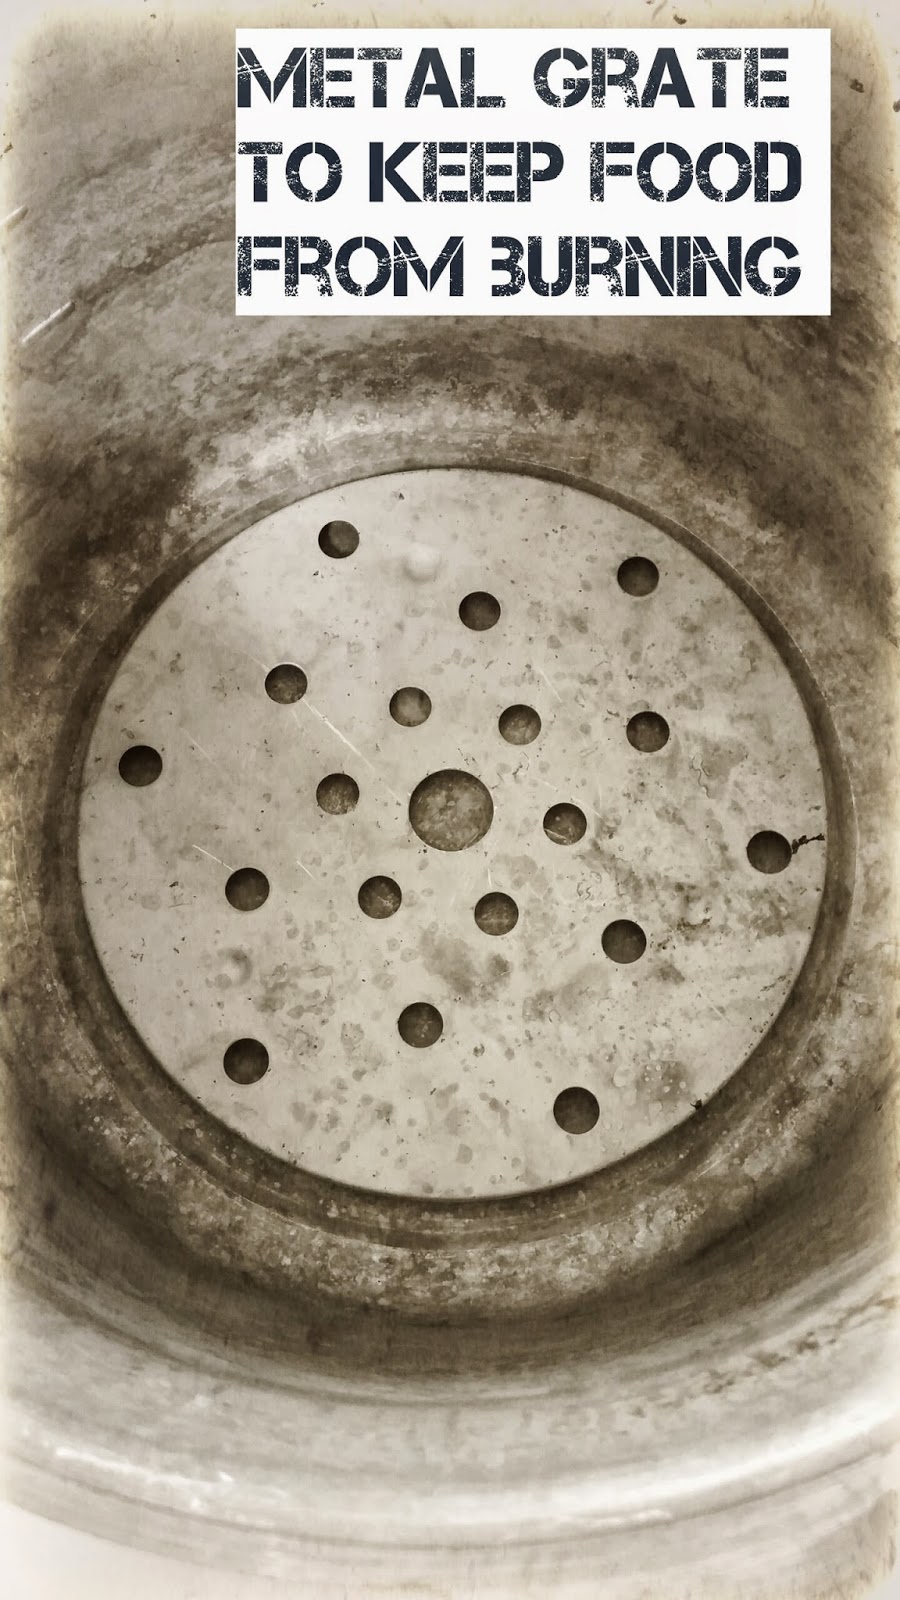
4. Metal grate
5. Weight
I may not have used specific terminology for this particular blog, but these are the terms I choose to use to elaborate on the process of using a pressure cooker. Remember, the best way to learn how to use a pressure cooker is to actually use the manufacturer's directions. Even more, talk about how to use a pressure cooker with someone who has actually cooked with one before. Their experience can provide an opportunity (with manufacturer's directions) to ask questions and clarify your understanding of how to safely and effectively cook a delicious dish. (My mother taught me how to cook with a pressure cooker and I have been cooking with one since I was about 13.)
1. Check the small seal on the pressure cooker lid. Make sure that the seal is free of debris and moves. Do not attempt to pop it out. This may damage the small seal and also cause issues with achieving desired pressure. Or worse, you could have a problem during cooking with pressure that can cause serious injury.
2. Continue to check the lid of the pressure cooker. Check the small hole where the weight will sit. I always check to make sure that I can see through the hole on the lid to ensure that there is no debris blocking the hole. Steam flows out of this small opening and helps communicate pressure level with a sound that the steam creates.
3. Add the rubber seal to the lid of the pressure cooker, taking care that it slips between the metal piece attached to the handle. This metal piece will help lock the pressure cooker in place. The rubber seal is to obviously create a seal in order for pressure to be built for the cooking process.
 |
| Place the metal grate in the bottom of the pressure cooker, leaving the metal grate up avoiding burning food because the food will sit directly on the grate instead of on the bottom of the pressure cooker pot. |
4.Place the metal grate down in the bottom of the pot. The metal grate should be placed where there is a slight gap between the entire grate and the bottom of the pan, allowing food the opportunity to cook, not burn. (Burnt food in the pressure cooker is gross. Nuff said.)
5. Add all of ingredients. Be careful to look at the fill lines. If you are going to cook a large amount in the pressure cooker, be sure that you do not over fill. Pressure building can be compromised again, and it can cause injury. Follow recipe directions for pressure cooker dishes, because food can be burned if not enough ingredients (water or broth) has not been added.
6. Once the pressure cooker has been filled correctly, take the lid and line up the arrows on the pressure cooker and the pressure cooker lid. This is where you will slide the pressure cooker lid into place. A metal lock will also slide in place to hold in pressure. When the pressure is built, the metal bobber (not technical term) will rise and hold lock even more in place.
7. Add weight to the top of the pressure cooker lid. Make sure that it is situated correctly and able to move as steam and heat passes through the vent. Do not leave the weight off. The weight helps the pressure build inside to cook your dish. The steam also is able to come through the little vent. Additionally, the sound that is created (jiggling sound), included below, communicates that cooking is taking place and pressure is built.
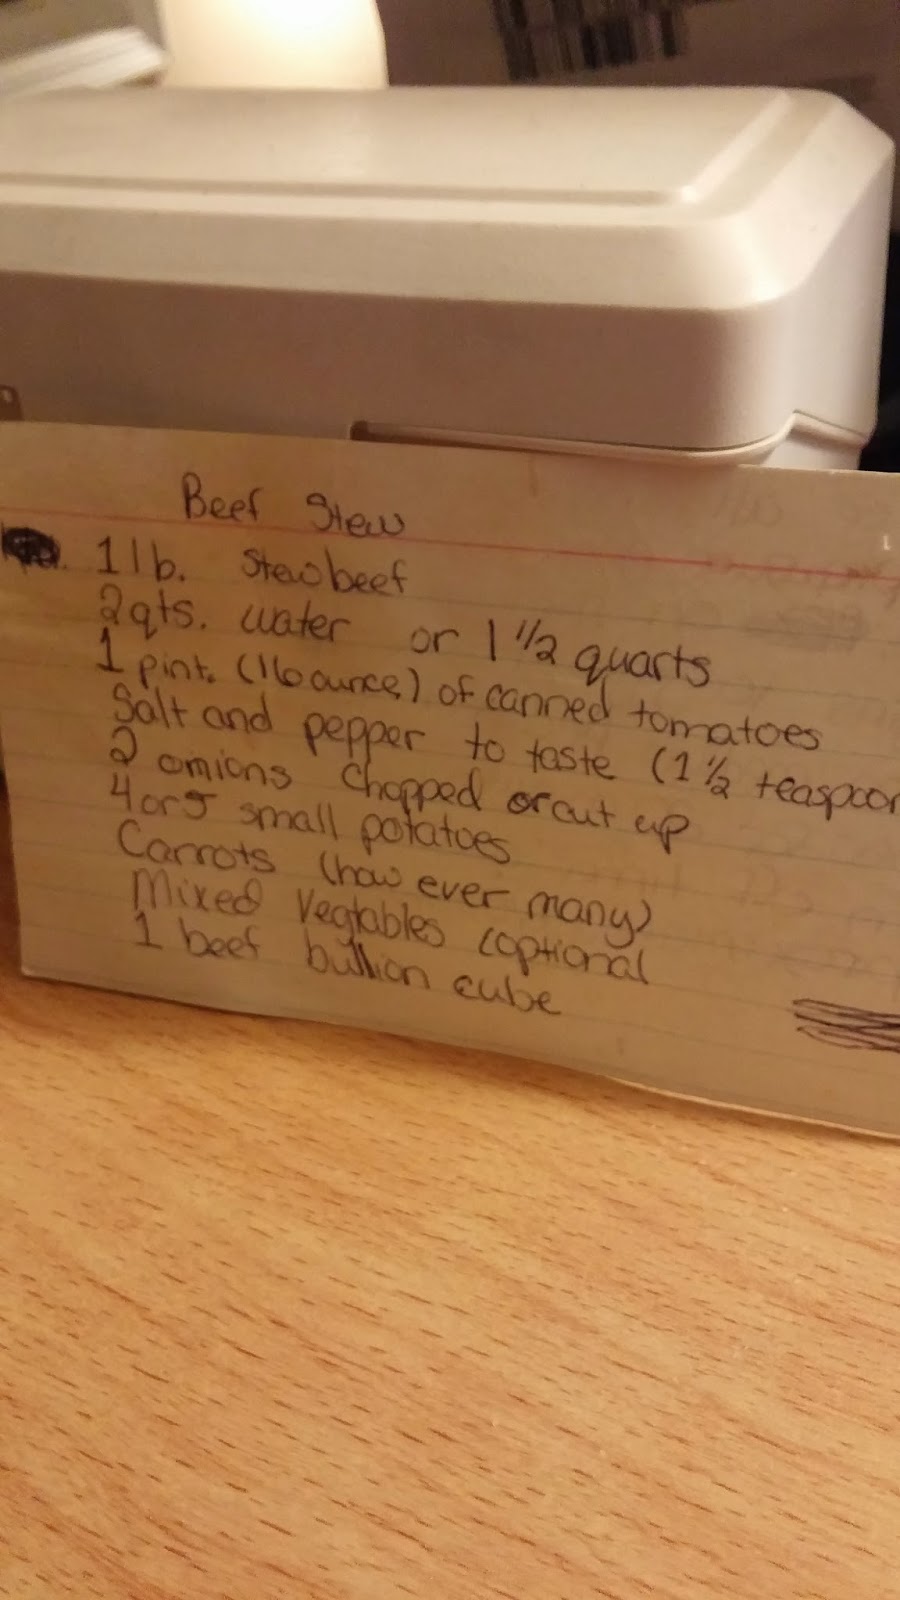
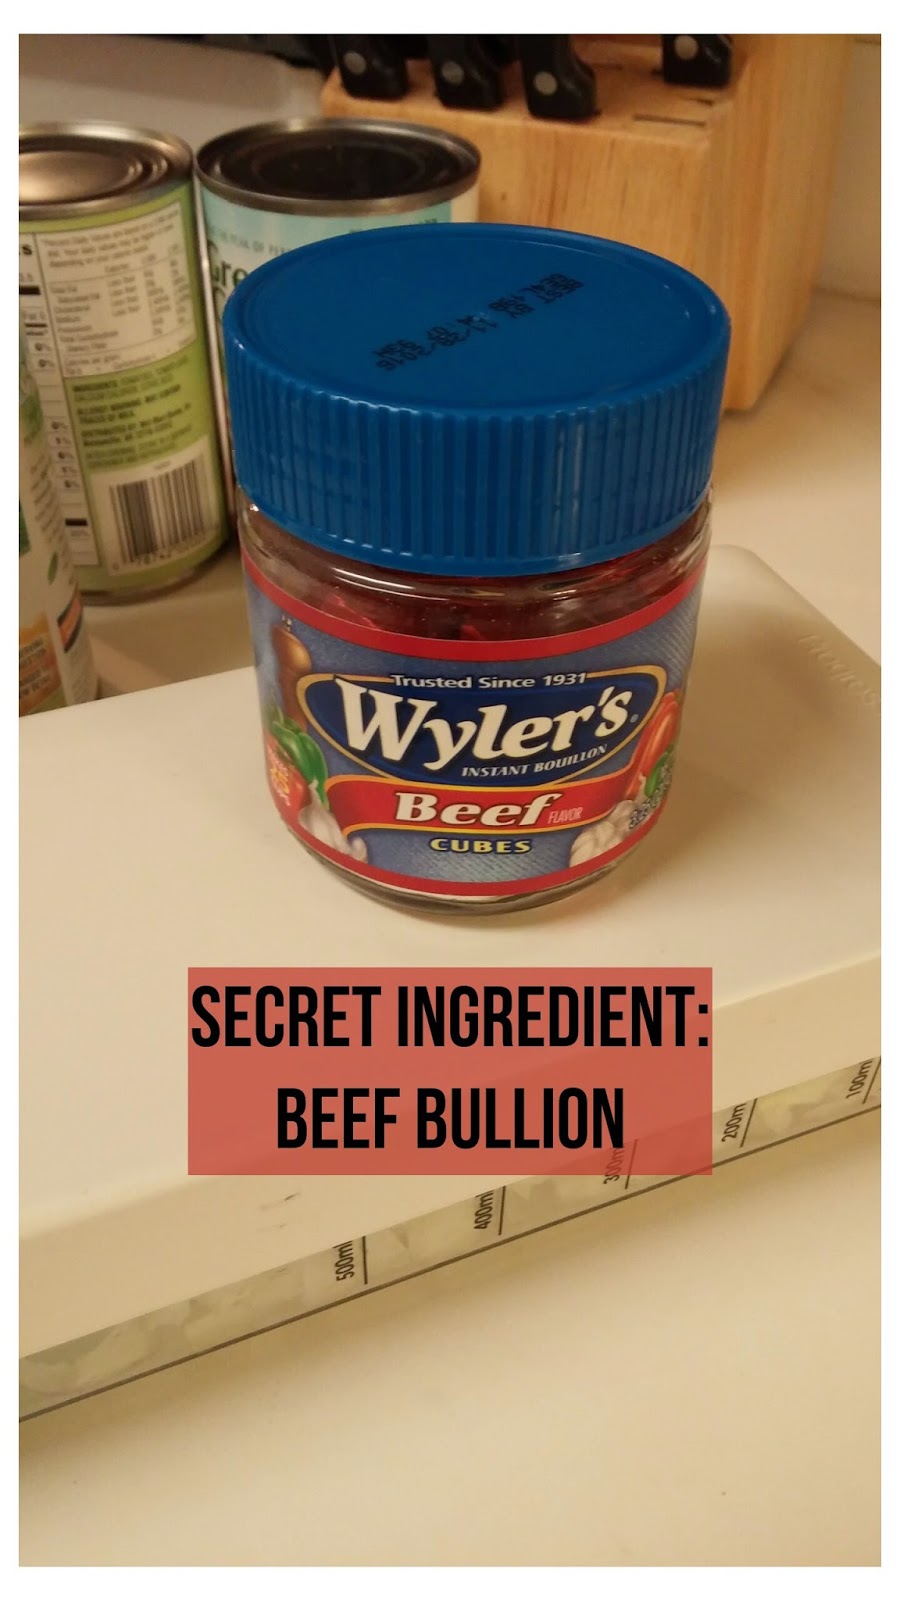
8. Cook food following directions from recipe from a reputable source. These recipes have been tried and you will have more accurate results, avoiding overcooking, under cooking, and incorrect use of the pressure cooker. I included a recipe from my mother:
Rebecca's Beef Stew
9. Once cooking time has been achieved,turn off the heat and allow the pressure cooker to decrease fully before attempting to open the pressure cooker.
WARNING- Failure to follow manufacturer's directions can cause severe injury and burns to self and to others. Make sure you know what you are doing before you attempt this.
Never ever, ever, ever, ever, ever remove the weight from the top of the steam vent while there is still pressure in the pressure cooker. There is an extreme amount of pressure built up inside that will force the liquid through the steam vent and damage ceiling and surroundings. The user is also in danger of severe burns and injury if directions are not followed properly.
10. Enjoy your dish.
Check out other blogs and videos from YouTube about accurately using a pressure cooker. The pressure cooker is such an awesome tool to cook with, but if handled inappropriately, can cause severe injury to self and food.
Handle with care.